So, I bought one of these digital frames a while back and just got around to trying it out. The frame has a roughly16:9 aspect ratio screen, so I was expecting to have to crop some of my images to that ratio so that they’d display nicely (it does also support a 4:3 mode, but that leaves black bars left & right on the screen).
Problem was that when I converted the images to the 480 x 234 resolution that the manual states the screen is, I ended up with black bars above and below and the image squashed down. Took me a while to work out what it was really doing… even in 16:9 mode it is expecting to be given 4:3 photos (which is what most digital cameras take). All it does is stretch them out to fit the screen, which distorts them.
My solution, after a little trial and error, was this process:
- Scale the image to be 960 pixels wide, preserving the aspect ratio. In my case, I got iPhoto to export them at that width, but you could do it afterwards too.
- Crop the image so that it is 960 x 468 pixels. I have this set up as a Photoshop action to take the centre slice, but for some images that is not the best crop and you’ll have to do those manually.
- Finally, scale the image to be 624 x 468 not preserving the aspect ratio in this case (so you effectively squash it horizontally). This will make it look very strange on the PC, but the frame will stretch it back out.
So you can see what the effect of the processing is, here’s a before and after pair from one of the photos I took in Mexico:

|

|
| Before |
After |
When the frame stretches this out again to the 16:9 ratio it will look normal. The reason for the additional resolution, despite the recommendation in the user guide not to exceed 480 x 234, is so that it has more pixels than it needs. When I tried the smaller images, they came out looking blurry. The 624×468 resolution seems to look OK unless you study it close up (and who does that with a framed snapshot?).
I have the steps above stored in an action in Photoshop so I can apply it to a batch of photos, store them on a CF card and then have them run as a slideshow. The quality of the screen is not stunning, but then I didn’t expect it to be for the price. What was disappointing was that I couldn’t just load native resolution images into it and have it just render them directly, but my simple image processing trick works around that problem nicely and I am happy with the results.

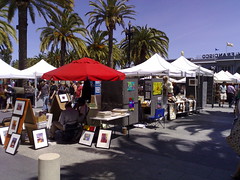
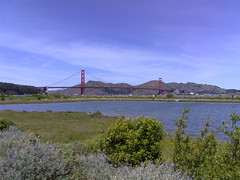
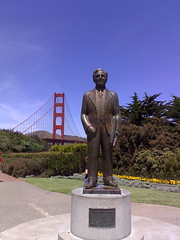 Flickr has a special event going where they are collecting photos taken on May 5, 2007 into a pool called 24 hours of Flickr. As it happens, I was out and about in San Francisco that day and have a lot of photos that I could submit. I’ve uploaded the ones I like best to my Flickr stream, but I’m having trouble selecting the one to submit.